First up is a lovely little mug rug I made for Miss K's kindergarten teacher. I've never done a teacher gift before, but I imagine a teacher gets a lot of similar items each year - and she probably got multiples of what we bought at the store for her, so I wanted to make something more personal.
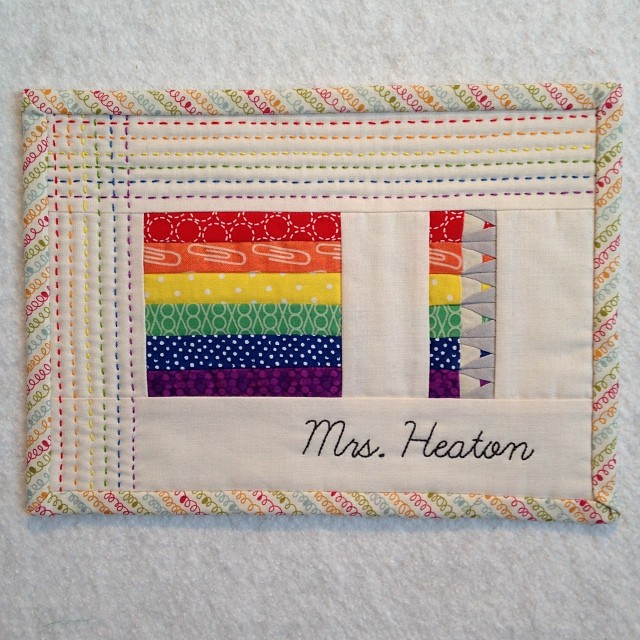
I adapted the Vintage Pencil Case pattern that is in the Winter 2014 issue of Modern Patchwork Magazine. The pattern only had 5 pencils, but I wanted to complete the rainbow so I added a 6th and widened the borders allowing for the stitching. The rainbow quilting inspiration came from Me and My Sisters Designs.

My girls have asked Santa for American Girl dolls (Miss B for a sweet Bitty Baby with yellow hair and green eyes. Miss K for an American Girl doll that is just like her with glasses and earrings, who loves horses just like she does.) I've got an in with the big guy, so I went ahead and made some little quilts to keep the dolls warm.
Miss B LOVES cat's (if she's not asking for a baby sister she is asking for a "kit-lin"), when Elizabeth @ Oh, Fannson! announced her Catvent-Quilt-Along I knew I needed to make one for B. Of course I gave up after a few blocks, then added in some more solid faces, and made a lovely little mini. I used B's favorite colors, and she is super excited about it. I FMQ it with echoing flowers. Final measurements are 18" x 24.5" big enough she could wrap her bitty baby up.

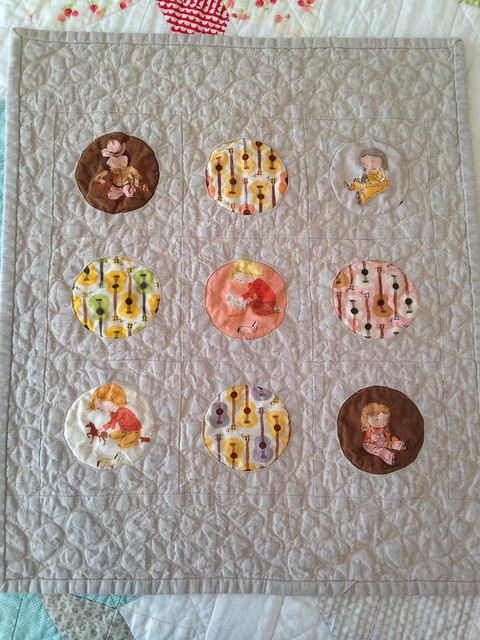
I also had a lot of fun with Miss K's quilt. She LOVES horses (For her birthday this year she asked for a roller skating horse. Thankfully Build-a-Bear was able to come through with that one!) and guitars. She already has a library tote featuring Heather Ross' Far Far Away II cute little girl playing with horses, and I was able to get my hands on a bundle of all of the horse prints and coordinating guitars. Seriously if there was ever a fabric created just for one little girl it was this line!
While I was waiting for my Heather Ross fabric to arrive I came across THIS awesome piec-lique tutorial by Cristy @ Sew Much Like Mom. Seriously go check it out! Life changing! I couldn't wait to try out circles, so I decided to go for it with Miss K's quilt. My circles started out at about 3" diameter, but between the linen in the Heather Ross fabric and the Essex linen I used for the background, the quilt experienced a TON of shrinkage! I got daring and FMQ pebbles in the background! The texture of this quilt is just glorious. And she LOVES it! Thankfully I have a lot more fabric left to make one her size. This quilt finished at 15" x 17.5" a bit smaller than I'd hoped, but hopefully her doll will still stay warm.
While I was waiting for my Heather Ross fabric to arrive I came across THIS awesome piec-lique tutorial by Cristy @ Sew Much Like Mom. Seriously go check it out! Life changing! I couldn't wait to try out circles, so I decided to go for it with Miss K's quilt. My circles started out at about 3" diameter, but between the linen in the Heather Ross fabric and the Essex linen I used for the background, the quilt experienced a TON of shrinkage! I got daring and FMQ pebbles in the background! The texture of this quilt is just glorious. And she LOVES it! Thankfully I have a lot more fabric left to make one her size. This quilt finished at 15" x 17.5" a bit smaller than I'd hoped, but hopefully her doll will still stay warm.
Besides these projects I've been working on my red and white Double Irish Chain, in hopes of getting it done before my husband deploys (eek! that is coming too soon!) and I've taken up cross stitch, but it'll be a really long time before I have any finishes to show you in that department.


